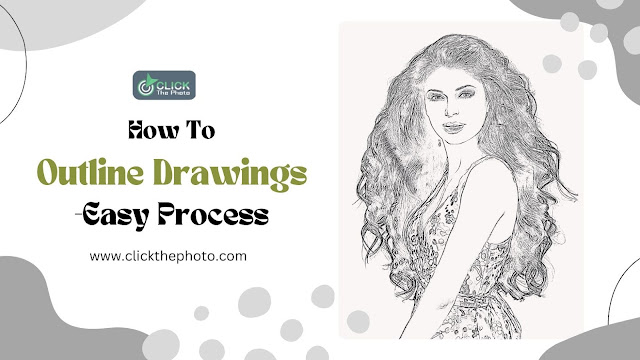
Drawing is a timeless form of expression, allowing individuals to unleash their creativity onto a blank canvas. Whether you're an aspiring artist or simply enjoy doodling in your spare time, mastering the art of outlining can take your drawings to new heights. Outlining serves as the foundation of any artwork, providing structure and definition to your creations. In this comprehensive guide, we'll explore an easy step-by-step process to help you outline drawings with confidence and precision.
Understanding the Importance of Outlining:
Before diving into the outlining process, it's essential to understand why outlining plays a crucial role in drawing. Outlining serves several purposes:
- Defines Form and Shape: Outlining helps define the form and shape of objects within your drawing, making them easily recognizable to viewers.
- Creates Depth and Dimension: By adding varying line weights and styles, outlining can create the illusion of depth and dimension in your artwork.
- Enhances Composition: Outlining allows you to establish the composition of your drawing, guiding the viewer's eye and creating a sense of balance and harmony.
Now that we've established the importance of outlining let's delve into the step-by-step process:
Step 1: Sketch Your Drawing
Begin by sketching the basic outline of your drawing lightly using a pencil. This initial sketch serves as a rough guide for your outlining process, so don't worry about adding too many details at this stage. Focus on capturing the overall shapes and proportions of your subject.
Step 2: Determine Your Outlining Technique
Before outlining your drawing, consider the style and effect you want to achieve. There are various outlining techniques you can experiment with, including:
- Contour Lines: These lines follow the contours of your subject, outlining its shape and form.
- Cross-Hatching: This technique involves creating a series of intersecting lines to add shading and texture to your outlines.
- Scribbling: Scribbling involves creating rapid, spontaneous lines to outline your subject, adding energy and movement to your artwork.
Choose the technique that best suits your drawing style and desired outcome.
Step 3: Start Outlining
Once you've determined your outlining technique, it's time to start outlining your drawing. Begin by tracing over the initial sketch with a pen or fine-tip marker, gradually refining the lines as you go. Pay attention to the contours and details of your subject, adding depth and definition with each stroke.
Step 4: Vary Line Weights
To add visual interest to your outlines, vary the weight of your lines. Thicker lines can be used to emphasize important features or areas of shadow, while thinner lines can add delicate details and highlights. Experiment with different line weights to create depth and dimension in your artwork.
Step 5: Add Details and Texture
Once you've outlined the main shapes of your drawing, consider adding additional details and texture to enhance realism. You can use techniques such as cross-hatching, stippling, or blending to add shading and texture to your outlines, bringing your artwork to life.
Step 6: Erase Excess Sketch Lines
Once you're satisfied with your outlines, carefully erase any excess sketch lines remaining from the initial drawing. Be sure to erase lightly to avoid smudging or damaging your outlines.
Learn More: Photo Retouching Service
Step 7: Final Touches
Finally, take a step back and assess your outlined drawing. Make any final adjustments or additions as needed to ensure your artwork is polished and cohesive. Consider adding foundation components or extra subtleties to improve the general arrangement.
Step 8: Practice Regularly
As with any skill, practice is key to mastering the art of outlining drawings. Set aside time regularly to practice different outlining techniques and experiment with various styles. The more you practice, the more confident and proficient you'll become in outlining your drawings.
Step 9: Seek Inspiration and Feedback
Don't hesitate to seek inspiration from other artists or artworks to fuel your creativity. Explore different styles and techniques used by artists across various mediums, and incorporate elements that resonate with you into your own artwork. Additionally, consider sharing your outlined drawings with fellow artists or seeking feedback from friends and family to gain valuable insights and improve your skills.
Step 10: Embrace Mistakes and Learn from Them
Recollect that committing errors is a characteristic piece of the growing experience. Instead of becoming discouraged by imperfections in your drawings, embrace them as opportunities to learn and grow as an artist. Analyze your mistakes, identify areas for improvement, and apply what you've learned to future drawings. With each mistake, you'll gain valuable insights that will ultimately help you become a better artist.
Step 11: Experiment and Push Your Boundaries
Don't be afraid to step out of your comfort zone and experiment with new techniques, styles, and subjects. Pushing your artistic boundaries allows you to discover new possibilities and expand your creative horizons. Whether it's trying a different outlining technique or tackling a challenging subject, embrace the opportunity to grow and evolve as an artist.
Step 12: Share Your Artwork
Lastly, don't keep your outlined drawings to yourself—share them with the world! Whether it's through social media, online galleries, or local art exhibitions, sharing your artwork allows you to connect with others who appreciate your creativity and talent. Be proud of your accomplishments and continue to share your passion for drawing with others.
Conclusion:
Mastering the art of outlining drawings is a rewarding journey that requires patience, practice, and perseverance. By following the easy step-by-step process outlined in this guide and incorporating tips for improvement, you can enhance your drawing skills and create stunning artwork that captivates and inspires. So pick up your pencils and pens, and let your imagination run wild as you embark on your next drawing adventure!


.jpg)
0 Comments