Introduction
Photoshop is a powerful tool for photo editing, graphic design, and even creating digital art. One of the many things you can do in Photoshop is to change the thickness of text. This can be useful for creating logos, headlines, or any other text design that needs to stand out. In this tutorial, we will show you how to make text thicker in Photoshop.
Using the Bold Option
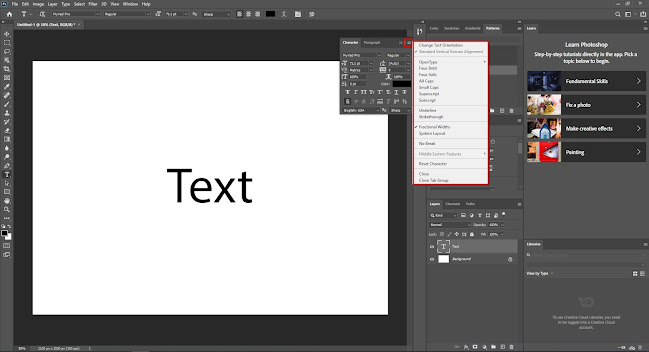
One way to make text thicker in Photoshop is to use the bold option, which can be found in the font options bar at the top of the screen. This option is available in most fonts and is a quick and easy way to add weight to your text. However, depending on the font and design of your text, the bold option may not always be the best choice for making your text thicker.
Another way to make text thicker is to adjust the font size. By increasing the font size, you can add more weight to your text and make it appear thicker. This method can be particularly effective if you want to make a specific word or phrase stand out from the rest of the text.
You can also experiment with different fonts to achieve a thicker text effect. Some fonts naturally have a heavier weight than others, and by choosing a font with a thicker weight, you can make your text appear thicker without having to use the bold option or adjust the font size.
Finally, you can consider using Photoshop's layer styles to add more depth and dimension to your text. By applying a stroke or drop shadow effect to your text, you can make it stand out more and give it a thicker appearance. Overall, there are various ways to make text thicker in Photoshop, and it's important to experiment with different techniques to find the one that works best for your specific needs.
Using Stroke
In addition to changing the font weight, you can also add a stroke to the text in Photoshop to make it appear thicker. A stroke is essentially an outline or border around the text that can be customized to any size and color. By adding a stroke to your text, you can further emphasize and highlight the text. This can be especially useful when creating titles or headings that need to stand out.
To add a stroke to your text, start by selecting the text layer in the layers panel. Then, go to Layer > Layer Style > Stroke. From here, you will be presented with a range of options that allow you to customize the size, color, and position of the stroke. For instance, you can adjust the size of the stroke to make it thicker or thinner, or change the color to match the theme of your design.
One of the advantages of using a stroke is that it provides greater flexibility and control over the thickness of the text. Unlike changing the font weight, which can only be done within certain limits, adding a stroke allows you to create text that is as thick or thin as you want. Additionally, you can choose where to position the stroke relative to the text, such as inside, outside, or centered on the text.
Overall, adding a stroke to your text is a great way to enhance its visual impact and make it stand out. By experimenting with different stroke options, you can create text that is both attractive and effective in conveying your message. So next time you're working on a design project in Photoshop, don't forget to try out this useful technique!
Using the Warp Tool
The warp tool is one of the many features of Photoshop that can be used to enhance text. With this tool, you can manipulate text in various ways, including making it thicker, which can add depth and dimension to your designs. To use the warp tool, you will need to select the text layer in the layers panel, then go to Edit > Transform > Warp. This will bring up a grid with various control points and handles that you can use to distort and manipulate the text.
Learn More:
While using the warp tool to make text thicker requires more skill and practice, it is a valuable technique to have in your creative arsenal. By experimenting with different shapes and thicknesses, you can create unique and eye-catching text designs that will set your work apart from others. Additionally, the warp tool is not just limited to text - you can use it to manipulate other design elements as well, such as shapes and images.
In conclusion, while the warp tool in Photoshop may take some practice to master, it is a powerful feature that can greatly enhance your designs. By using this tool to manipulate text, you can create designs that are both unique and visually appealing.
Conclusion
Making text thicker in Photoshop is a simple process that can be done in a variety of ways. Whether you choose to use the bold option, stroke, or warp tool, each method offers its own advantages and can be used to create different text designs. By experimenting with these methods, you can find the perfect way to make your text stand out and grab attention.


.jpg)
0 Comments